Disable a class

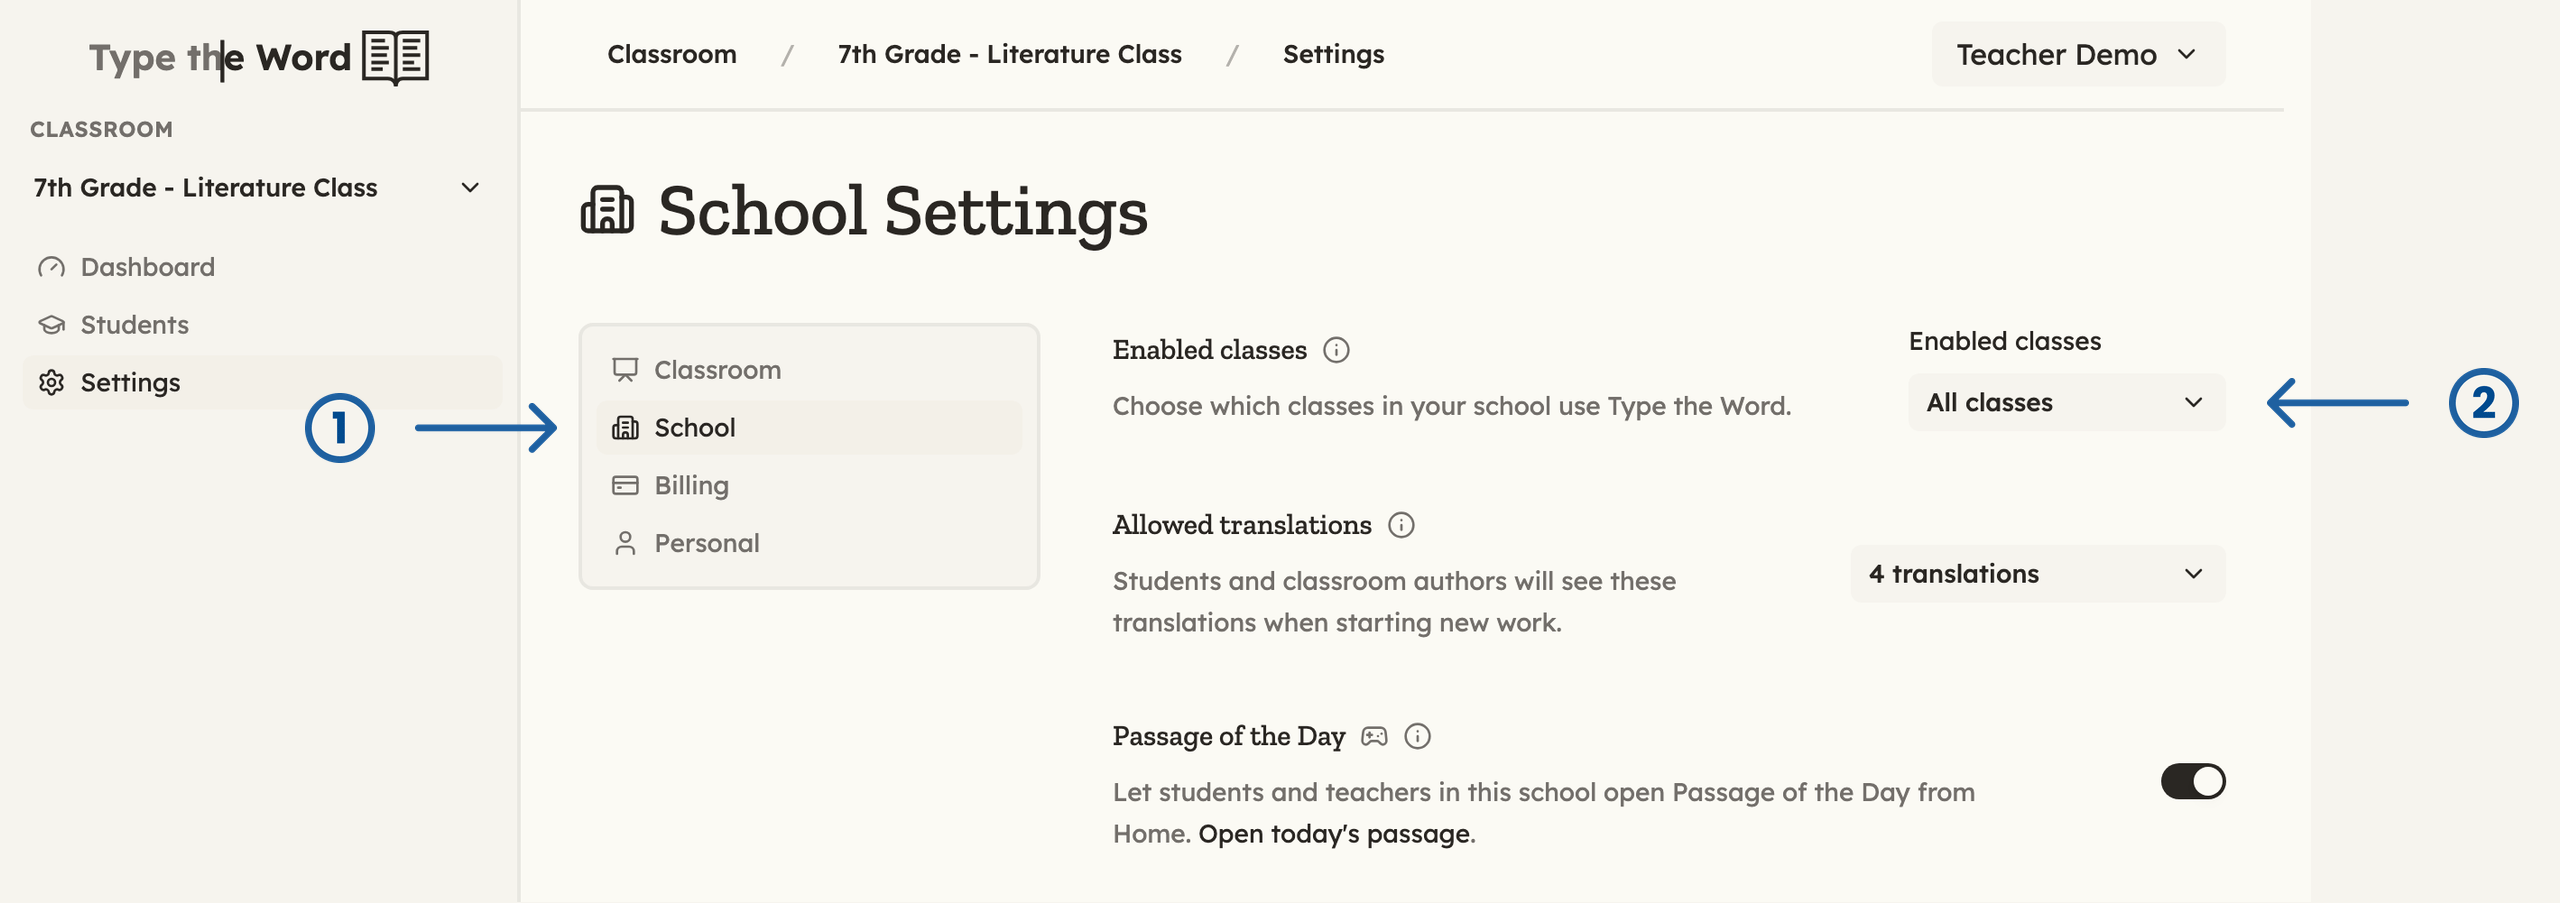
  1. Open “Settings”, then “School”.
  2. Open the “Enabled classes” list and uncheck the classes you want to disable.
  3. Select “Save”.
If your account does not belong to a school, find “Enabled classes” under “Classroom” instead.
School settings with numbered arrows pointing at School and Enabled classes

Open "School" (1), then use "Enabled classes" (2) to choose which classes stay available.

If your class belongs to a school, the list includes every class at your school. Your choice applies to every teacher at the school, so check with them before disabling a shared class. New classes from your roster are enabled by default.

What changes when a class is disabled

  • The class no longer appears in the classroom selector.
  • Roster and LMS syncing continue, including student additions and removals.
  • Opening the class shows “This is a disabled classroom. Enable it in Settings to use it again.” Select “Open Settings” to re-enable it.

Re-enable a class

Check the class in “Enabled classes” again and select “Save”. It returns to teacher navigation without needing a catch-up sync.

Classes on your plan

You can pay for enabled or disabled classes. Disabled classes remain grouped under “Disabled classes” in “Billing”, with a tooltip explaining their status. Paying for a disabled class does not enable it. Disabling a paid class does not remove it from your plan or change its billing coverage. Choose “Adjust Plan” to change which classes you pay for. See How billing works within TTW.